My Routine March ’15

One thing that changes constantly is my hair washing and styling routine. Not only am I a product junkie, but I’m also intrigued by new techniques (and if you’re familiar with the curly care world, there are tons of different ways to wash, rinse, detangle, apply products and dry the hair).
Pretty much all of last year (the year I took to try my hand at professional hairdressing), I was shampooing and conditioning my hair the way you’re instructed on the bottle: lather, rinse, repeat if necessary, rinse and apply conditioner, rinse. I even started using sulfate and silicone laden products.
I did this because I was a hairdresser in training and thought I should be taking care of my own hair the way I was being taught to take care of the clients’ hair. Despite knowing that the CG method worked for me – I’ve been using the CG method in some shape or form for seven years now. And every time I stop following the CG method of hair care, eventually my hair gets cranky; it gets frizzy, dry, stops curling as much and causes general frustration (despite any claims otherwise on product labels).
When I returned from Europe, my hair was just doing some weird frizzy-straight kind of thing and I just wanted to get some semblance of a defined wave back into my hair. So I did what I’ve known to work before: I hid away all my products with sulfates, non-water-soluble silicones and drying alcohols and made sure to only detangle my hair when it was soaked in conditioner.
And so, from beginning to end, this is my current routine. This has been working for me for the past few weeks.

Method (to the madness):

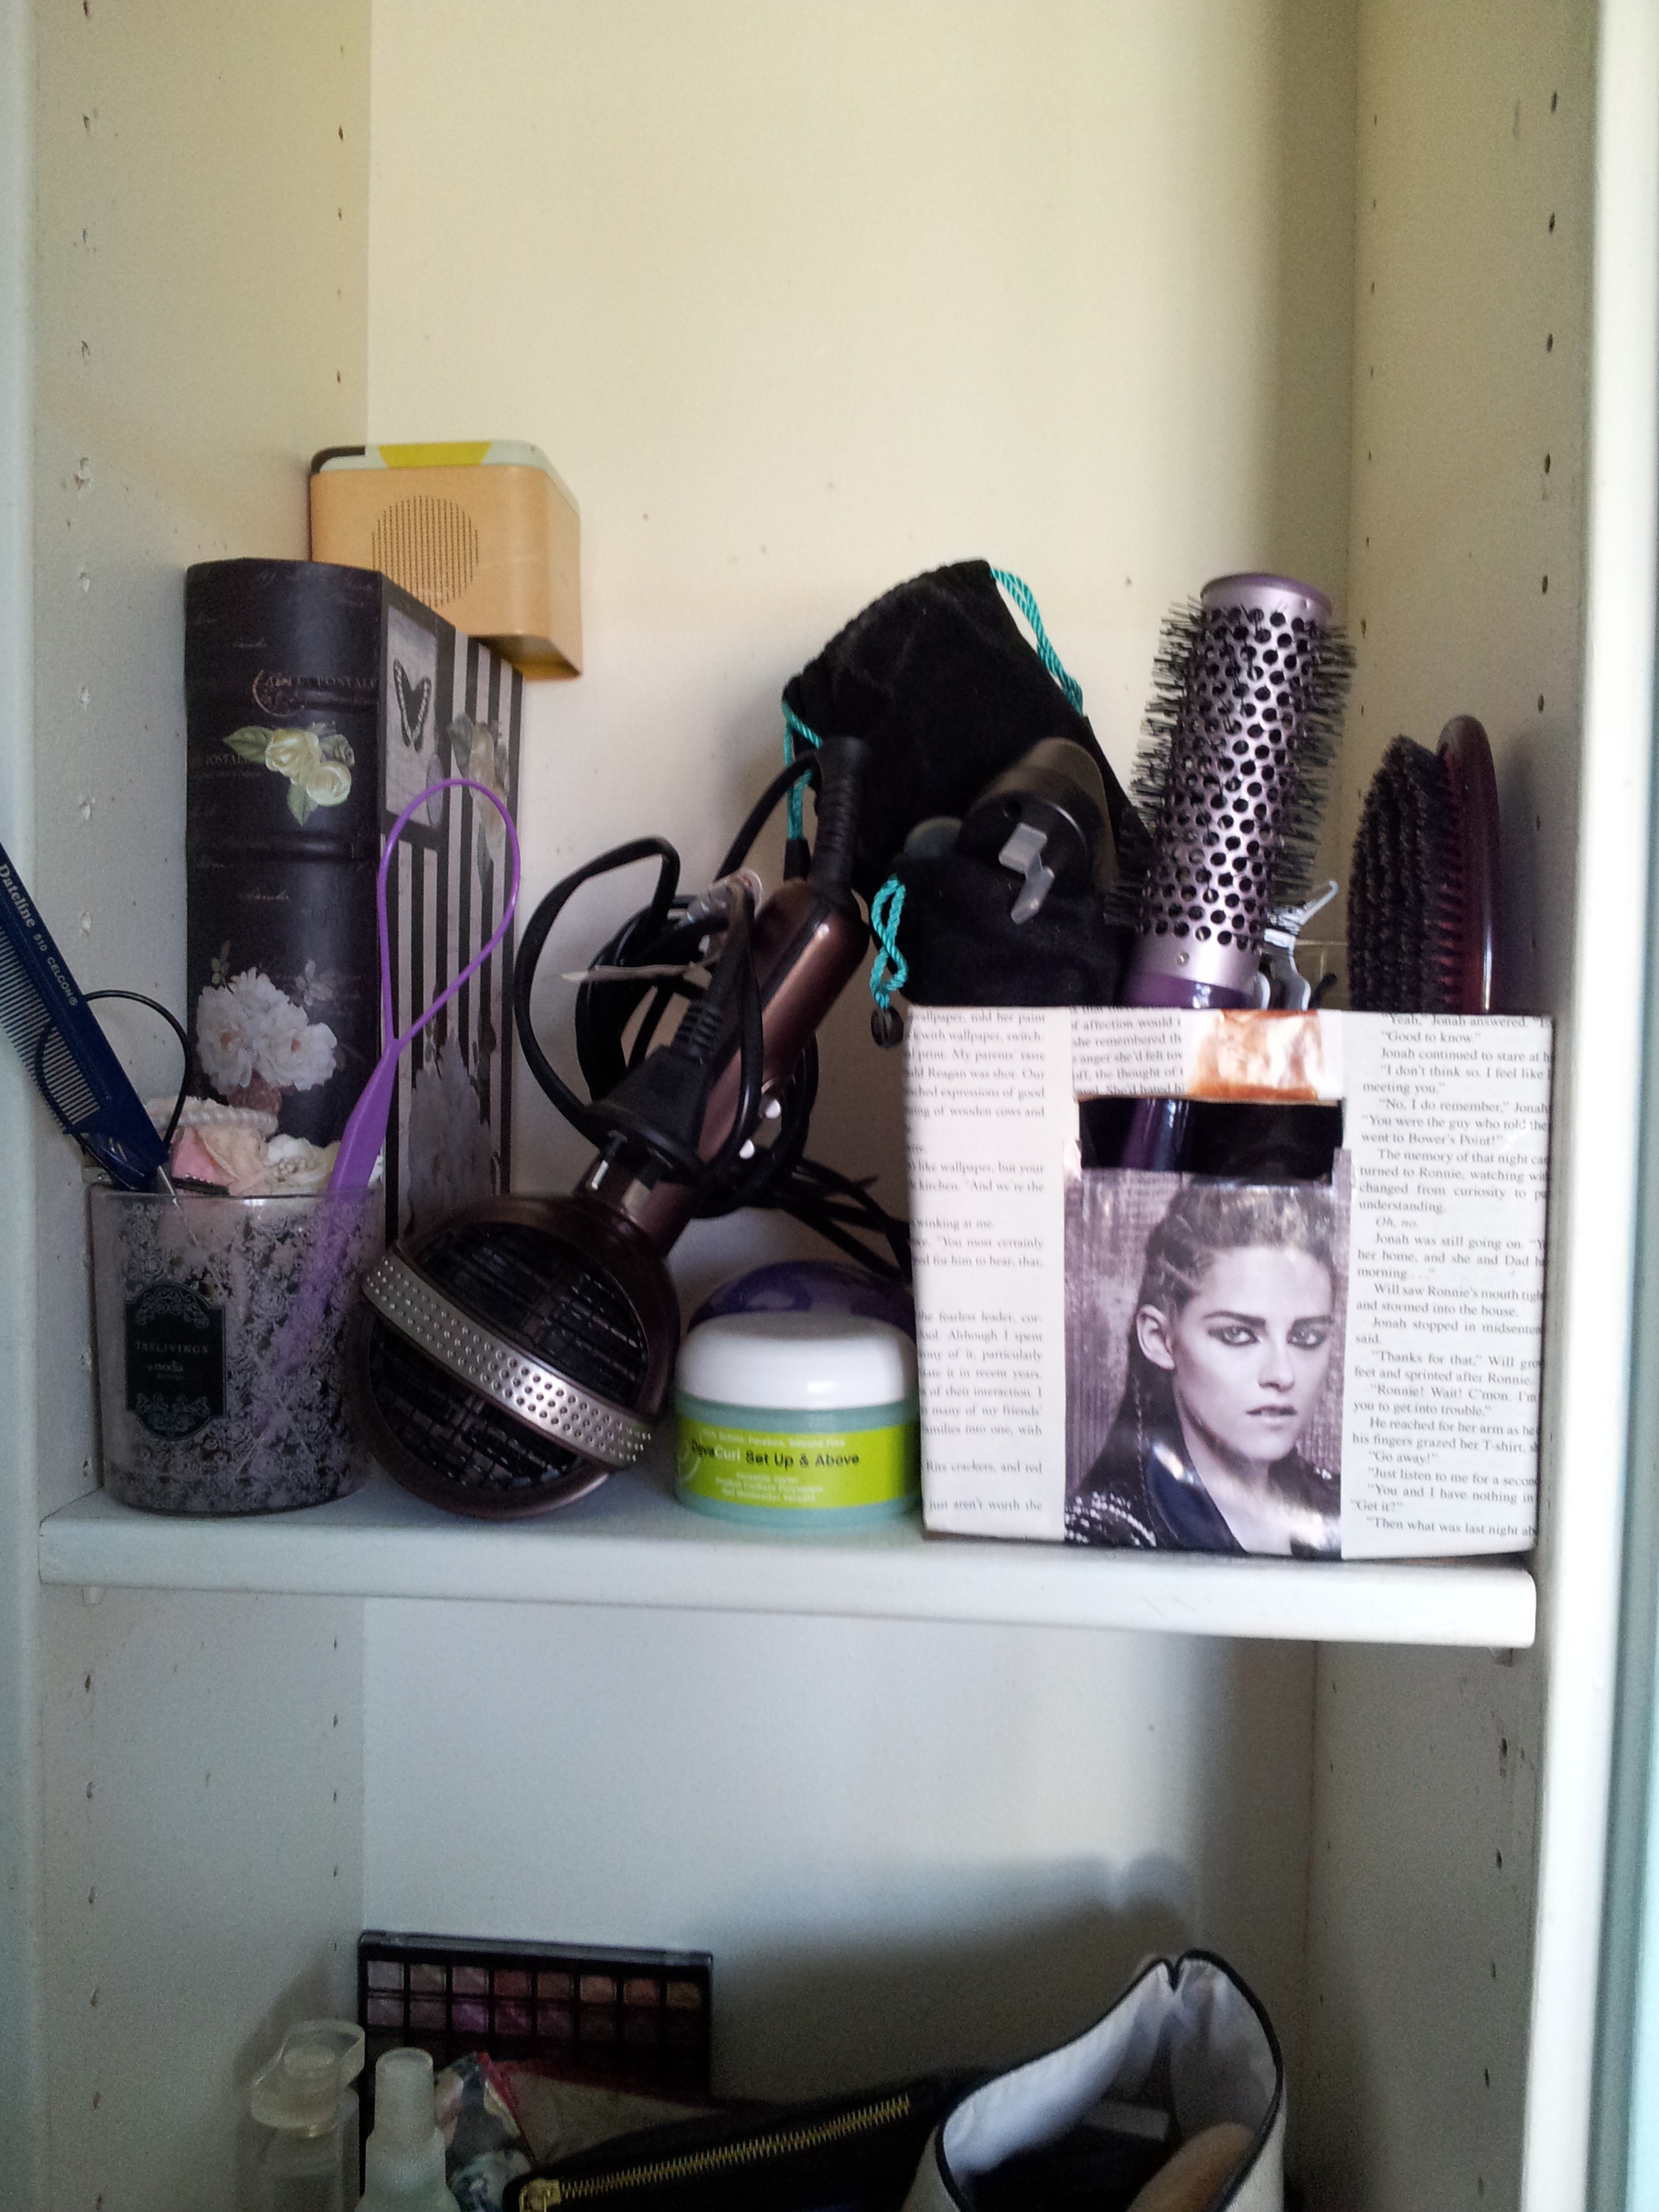
1. Co-wash with Shea Moisture African Black Soap Balancing Conditioner (I picked this up on my recent trip to the States). I scrub at my scalp with the pads of my fingers, nice and thoroughly.

2. Condition with Sukin Moisture Restoring Conditioner. I split my hair into two sections; I put quite a bit of conditioner on each section, until I can easily slide my fingers through the strands without catching on snarls.

3. De-tangle with my new Denman brush – I picked this up in the UK recently and I love it! You can find these brushes at Hairhouse Warehouse or Price Attack in Australia but there are also cheap dupes that work just as well. I use this brush to gently get through any of the smaller knots I may not have got through when I was using my fingers. Remember: gentle is the key.

4. Leave the conditioner in my hair while I go about my other shower routines (wash face etc).

5. Rinse. Some curly gurus suggest leaving in a bit of conditioner, but I try to rinse as much out as possible. When I’m rinsing I say to myself: ‘soft, not slimy’.

6. So now the water is off and my hair is rinsed out, but I don’t step out of the shower yet, and I don’t even squeeze the water out of my hair! This is where I begin my styling routine. First product: leave in conditioner! Splitting my hair into two sections again, I apply a small amount of the Living Proof No Frizz Leave In Conditioner to both sections – just over the surface of the section. My hair doesn’t like raking and combing in the styling stage.

7. Next comes a serum or oil. At the moment I’m using the DevaCurl MirrorCurls (I don’t remember it being quite so expensive when I bought it). I apply just a pea sized amount to both sections.

8. Last comes the gel: DevaCurl Ultra Defining Gel (another goody from the US). Again, I apply a blob to each section and work it through. Now that all my styling products are applied, I flip my head over, take another, smaller blob of gel and begin scrunching – I scrunch upside down, then tilt my head to either side and scrunch again.

9. Now, drying! Using a microfibre towel (you can go fancy or plain), I scrunch my hair again – upside down and each side.

10. My hair scrunched and no longer dripping, I put it into a plop while I do everything else I need to do to look presentable for the day.

11. Air dry. This leaves me looking a little straggly until my hair fully dries (watch it expand!), but it’s worth it to keep it healthy.

And there you have it! My full hair-wash routine. It doesn’t take as long as it seems to when it all happens fluidly. But this is also one of my more complex routines. I fluctuate between full routines like this and way more pared back routines. I’ll keep you guys updated now and then when my routine changes.

So I hope this gave you some ideas for caring for your own hair. Wavy and curly hair can be frustrating at times, but it’s also fun to play around with new products and techniques. Let me know if you have any questions, or leave a comment if you just want to say hi! I’ll say hi back 🙂

Love and waves,

Astrid

Tutorial: French Braid for Short Hair

A while ago I posted a picture of my hair in a French braid on my Instagram page, asking people to ‘like’ if they wanted a tutorial. And then almost two months passed. Well, today’s the day and here’s the tutorial of how to get a braid out of chin-length waves. It’s pretty easy, the tricky part is pinning up all the short strands at the nape of the neck.

image

Tools
Bobby pins x lots
Hair tie x 1

Steps
1. Take a section of hair towards the hairline. In this picture I took it off to the side and braided diagonally, but you can start in the centre too – this style is all about the texture and getting the hair off your face.
2. Split the section into three parts and do one stitch of a braid (one side over the middle, the other side over the new middle).
3. Take a new section of hair from the hairline to the braid and add it to the outer strand. Bring the strand with the added hair over the middle strand, making it the new centre strand.
4. Repeat until you run out of hair long enough to add to the French braid and tie off the end with a hair tie.
5. With the remaining hair, take it in random sections and start twisting them and pinning them until they are all up and out of the way.
6. Appreciate your effort with a selfie and tag me on Instagram if you have a go (@asteriskthat).

I apologise for the lack of images to help with the instructions; I’m hoping to film a tutorial for this simple braid soon.

Love and waves,
Astrid

I <3 Oil

Since the early days of learning to care for my wavy, curly hair, I’ve played with different oils. In the last year or two, oil has started to become one of the buzz words in the beauty industry. I think it started with argan oil and spread from there. The first oil I ever used was sweet almond oil – I believe I started using this with some essential oils as a night-time moisturiser. Then I decided I wanted to grow my hair out and read on the naturallycurly.com message boards that oiling your hair the night before you wash it helped with condition and growth. So my sweet almond oil was put to two uses.

That was back in 2008 and I’ve been pretty consistently oiling my hair at least once a week since then. After the sweet almond oil ran out I used coconut oil up until the end of last year when I decided to give jojoba oil a try. When that ran out I bought some avocado oil and that’s what I’m using at the moment. It does smell pretty avocado-y so I have to add lavender oil to it (which also helps with dry scalps and is supposed to be good for hair growth), but it adds a delicious flavour to my cooking 😛 (yay multitasking).

Now, in regards to the claim that oiling helps with hair growth – I can’t be certain. My hair grows steadily no matter what I do to it, and I’ve never been one to measure it every month. However, what I do know, is that it helped with the condition of my hair. I used to swim a lot and I was told by my hairdresser that my hair was in good condition. It was probably a combination of keeping sulfates to a minimum and doing regular deep treatments, but I’m sure the oil didn’t hurt. Besides, it’s a nice ritual and I like giving myself head massages while I catch up on TV shows.

How do I oil my hair?

1. Apply a small amount of oil with one drop of essential oil to the hairline.

2. Part hair from hairline to nape and repeat along the parting.

3. Part hair from ear to ear and repeat step 1 along this parting.

4. Repeat step 1 along the nape of the neck.

5. Apply a last puddle of oil to the ends of the hair and really work it in.

6. Massage the scalp. Try and cover the entire scalp at least three times.

7. Optional – gently detangle with tool of choice. This will help evenly spread the oil throughout the hair.

Do you use oils at all in your beauty routine? How do you like to use them, and what oil is your favourite?

Thanks for stopping by 🙂

Love and waves,
Astrid

Hair Product Storage: DIY

After the post about my iHerb.com haul, I decided to use the box packaging as storage for some of my hair products and tools. I’d been wanting to pick up a box or basket for this purpose for awhile, but then I decided that up-cycling a cardboard shipping box was a better idea – money-wise and environment-wise.
First I just threw in everything like this:
20140711_181601
But after a few days, I started to get sick of the thing looking so utilitarian. So I decided to personalise it.
Here’s what I did:

I used: scissors, glue, magazines, old paperback books and the brown paper that iHerb used to package the products in.
20140711_181612

Method:
1. Cut off the top flaps and holes on each of the narrower ends as handles. I ended up with this:
20140711_183041

2. Gather pictures from the magazines and pages of the old books (or any pretty paper you wish to use), and glue them onto the four outside surfaces. I used the brown paper to line the inside and bottom of the box, just to cover the tape and folds of the cardboard box.
20140712_130224

So when I started this DIY post, I thought the method would be a little longer than that. But I guess most of the effort is in time rather than multiple steps. One thing I’d like to add is a coat of glue to varnish and protect the slap-dash job I did. But for now, here is the finished product being put to use on my shelf:
20140712_130637

Yes, that’s a picture of Kristen Stewart from the latest Chanel campaign. Her hair in it is fantastic!

I hope this gives you guys some ideas for personalised product storage.

Love and waves,
Astrid

Lace Knot Braid Tutorial

Good morning, afternoon, evening readers!
Do you remember last week’s inspiration?
20140704_181510

Well, I told you guys I’d post a tutorial if I figured it out. And I did! So here’s what I call a ‘lace knot braid’, because it’s not actually a traditional braid – it uses knotting techniques. Now, I discovered that as a newbie blogger, I don’t have the resources to take proper photos of myself doing the intricate details of the blog,

Here we go:

1. Take a small section of hair and split it into two strands.
2. Taking the strand furthest from your face, wrap it around the other strand and tie a knot. Pull it tight.
20140709_134640
3. Join the two strands together and pick up a new strand. Wrap this around the strand you just created and tie a second knot. Pull it tight.
20140709_134821
4. Repeat step 3 as many times as you like until you get the desired look.
5. Secure at the end with bobby pins or a small elastic.

Et voila!
20140709_135857

I realised after I finished writing this that I was wrapping my knotted strands under instead of over, but you still get a fun new braid to try! I think it works either way 🙂

If you give this a go, let me know in the comments, or tag me on Instagram: @asteriskthat

I’m also happy to try and clarify if you find anything unclear.

Love and waves,
Astrid